ADVERTISEMENT
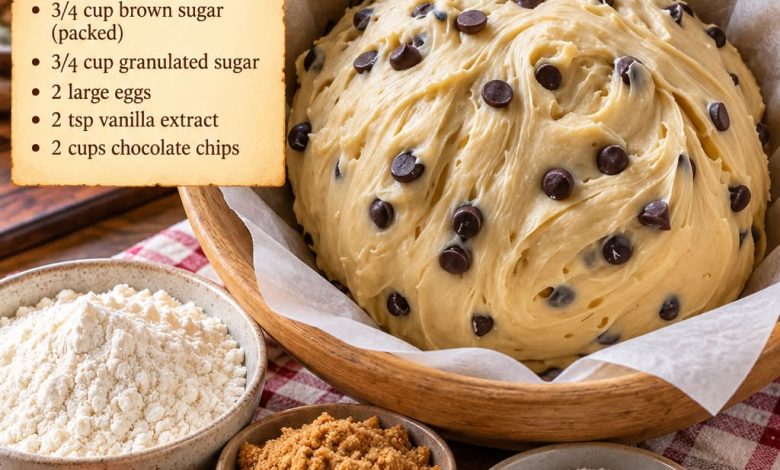
Chocolate Chip Cookie Dough
Introduction
There is something truly special about homemade chocolate chip cookie dough. The rich buttery aroma, the sweetness of brown sugar, the smooth vanilla flavor, and the generous amount of chocolate chips come together to create one of the most beloved treats in home baking.
This classic Chocolate Chip Cookie Dough recipe is perfect for anyone who loves soft, chewy cookies with golden edges and delicious pockets of melted chocolate. Made from scratch with simple pantry ingredients, this dough is easy to prepare and produces wonderfully comforting homemade cookies.
Whether you’re baking for a family gathering, preparing an afternoon treat, or filling your kitchen with the irresistible smell of freshly baked cookies, this recipe is a wonderful choice.
The secret to delicious chocolate chip cookies lies in using softened butter, the perfect balance of brown and granulated sugars, and allowing the dough to rest before baking.
Ingredients
For the Chocolate Chip Cookie Dough:
ADVERTISEMENT
2¼ cups (280 g) all-purpose flour
1 teaspoon baking soda
½ teaspoon salt
¾ cup (170 g) unsalted butter, softened to room temperature
¾ cup (150 g) packed brown sugar
ADVERTISEMENT
¾ cup (150 g) granulated sugar
2 large eggs, at room temperature
2 teaspoons pure vanilla extract
2 cups (340 g) semisweet chocolate chips
Optional Additions:
ADVERTISEMENT
½ cup (60 g) chopped walnuts or pecans
½ teaspoon ground cinnamon
¼ teaspoon flaky sea salt for sprinkling
Preparation Steps
Step 1: Prepare Your Ingredients
Before beginning, gather all the ingredients and measure them carefully.
Allow the butter and eggs to come to room temperature. Softened butter is especially important because it blends smoothly with the sugars and helps create a light, creamy mixture.
ADVERTISEMENT
The butter should be soft enough to press gently with your finger but should not be melted or oily.
Prepare a large mixing bowl, a separate bowl for the dry ingredients, an electric mixer or sturdy whisk, and a spatula.
Step 2: Combine the Dry Ingredients
In a medium mixing bowl, add the all-purpose flour, baking soda, and salt.
Whisk everything together until the ingredients are evenly distributed.
This step ensures that the baking soda is mixed throughout the flour, helping the cookies rise evenly during baking.
Set the dry mixture aside while preparing the butter and sugar.
Step 3: Cream the Butter and Sugars
Place the softened unsalted butter into a large mixing bowl.
Add the packed brown sugar and granulated sugar.
Using an electric hand mixer or stand mixer, beat the ingredients together on medium speed for approximately 2–3 minutes.
ADVERTISEMENT
Continue mixing until the butter and sugar become creamy, fluffy, and slightly lighter in color.
Brown sugar adds moisture and creates a soft, chewy texture, while granulated sugar helps produce lightly crisp edges.
Together, they create the perfect balance for classic chocolate chip cookies.
Step 4: Add the Eggs and Vanilla
Crack the eggs into the butter mixture, adding them one at a time.
Beat well after each addition until fully incorporated.
Pour in the vanilla extract and mix again until the mixture becomes smooth and creamy.
The vanilla adds warmth and enhances the rich flavor of the chocolate chips.
Scrape down the sides of the bowl with a spatula to ensure everything is evenly combined.
Step 5: Incorporate the Dry Ingredients
Gradually add the prepared flour mixture to the wet ingredients.
Mix on low speed or gently fold with a spatula until the flour is just incorporated.
Avoid overmixing the dough, as excessive mixing can develop too much gluten and make the cookies tougher.
The finished dough should be thick, soft, and slightly sticky.
Step 6: Fold in the Chocolate Chips
Add the semisweet chocolate chips to the cookie dough.
Using a spatula or wooden spoon, gently fold them into the mixture until evenly distributed.
Make sure the chocolate chips are spread throughout the dough so that every cookie contains plenty of chocolate.
If desired, reserve a small handful of chocolate chips to press onto the tops of the cookies before baking.
This simple technique gives homemade cookies a beautiful bakery-style appearance.
Step 7: Chill the Cookie Dough
Cover the mixing bowl tightly with plastic wrap or transfer the dough to an airtight container.
Place it in the refrigerator for at least 30–60 minutes.
Chilling helps the butter firm up, prevents the cookies from spreading too much, and allows the flavors to develop.
For an even richer flavor and thicker cookies, refrigerate the dough overnight.
If the dough becomes very firm, allow it to sit at room temperature for a few minutes before scooping.
Step 8: Prepare the Oven and Baking Sheets
Preheat your oven to 350°F (175°C).
Line two large baking sheets with parchment paper.
Avoid greasing the baking sheets heavily, as additional fat can cause the cookies to spread excessively.
Make sure the oven is fully preheated before placing the cookies inside.
Step 9: Shape the Cookie Dough
Using a cookie scoop or tablespoon, portion the chilled dough into balls containing approximately 2 tablespoons of dough each.
Place the dough balls onto the prepared baking sheets, leaving about 2 inches of space between them.
The cookies will spread as they bake, so proper spacing is important.
For a more attractive appearance, gently press a few extra chocolate chips onto the top of each dough ball.
Do not flatten the dough too much if you prefer thick, soft cookies.
Step 10: Bake Until Golden
Place the baking sheets in the preheated oven.
Bake for approximately 10–13 minutes, depending on the size of the cookies and your oven.
The cookies are ready when the edges become lightly golden brown and the centers look set but still slightly soft.
Avoid overbaking, as the cookies will continue to firm up while cooling.
For soft and chewy cookies, remove them from the oven when the centers still appear tender.
Step 11: Cool the Cookies
Remove the baking sheets from the oven and allow the cookies to rest on the trays for approximately 5 minutes.
During this time, the cookies will continue to set while maintaining their soft centers.
Carefully transfer them to a wire cooling rack.
Allow them to cool slightly before serving.
The chocolate chips will remain warm and soft, creating delicious pockets of melted chocolate.
Step 12: Serve and Enjoy
Arrange the freshly baked chocolate chip cookies on a serving plate.
For an extra special touch, sprinkle a tiny amount of flaky sea salt over the warm cookies.
Serve with a cold glass of milk, a warm cup of coffee, or your favorite afternoon beverage.
These cookies are especially delicious while slightly warm, when the centers are soft and the chocolate is beautifully melted.
Helpful Tips for Perfect Chocolate Chip Cookies
Use softened butter, not melted butter.
Properly softened butter creates a creamy dough and helps maintain the ideal cookie texture.
Measure the flour carefully.
Too much flour can produce dry, dense cookies. Spoon the flour into the measuring cup and level it off, or use a kitchen scale for greater accuracy.
Use both brown and granulated sugars.
Brown sugar provides moisture and chewiness, while granulated sugar encourages lightly crisp edges.
Avoid overmixing.
Mix the flour only until incorporated to keep the finished cookies tender.
Chill the dough before baking.
Cold dough spreads less during baking and helps create thicker cookies with a richer flavor.
Do not overbake.
Cookies continue cooking slightly on the hot baking sheet after removal from the oven.
Storage and Freezing Instructions
Storing Baked Cookies
Allow the cookies to cool completely before transferring them to an airtight container.
Store at room temperature for up to 4–5 days.
For the best texture, keep them away from direct sunlight and excessive heat.
Refrigerating Cookie Dough
Unbaked cookie dough can be stored in an airtight container in the refrigerator for up to 3 days.
Because this dough contains raw eggs and untreated flour, it should not be eaten raw.
Freezing Cookie Dough
Scoop the prepared dough into individual balls and arrange them on a parchment-lined tray.
Freeze until firm, then transfer the dough balls to a freezer-safe container or bag.
Store frozen for up to 3 months for best quality.
When ready to bake, place the frozen dough balls onto a lined baking sheet and bake directly from frozen, adding approximately 1–3 minutes to the usual baking time.
Delicious Serving Ideas
Homemade chocolate chip cookies are wonderfully versatile and can be enjoyed in many ways.
Serve them warm with a scoop of vanilla ice cream for a comforting dessert.
Sandwich a little ice cream between two cooled cookies to create homemade cookie ice cream sandwiches.
Crumble baked cookies over vanilla pudding or ice cream for a delicious topping.
You can also arrange them in a decorative cookie box for birthdays, holidays, family celebrations, or thoughtful homemade gifts.
For a cozy evening treat, pair a freshly baked cookie with a warm cup of milk or hot chocolate.
Conclusion
Chocolate Chip Cookie Dough is one of those timeless homemade recipes that never goes out of style. With its rich buttery flavor, soft texture, sweet vanilla aroma, and generous chocolate chips, it transforms simple everyday ingredients into an irresistible homemade treat.
The beauty of this recipe is its simplicity. You don’t need complicated techniques or special ingredients to create delicious cookies that taste as though they came straight from a bakery.
From mixing the creamy dough to watching the cookies turn golden in the oven, every step brings a little warmth and happiness into your kitchen.
Whether you’re baking with family, preparing a sweet weekend surprise, or simply satisfying a chocolate craving, these homemade chocolate chip cookies are always a wonderful choice.
Do you prefer your chocolate chip cookies soft and chewy in the center or golden and crispy around the edges?