ADVERTISEMENT
Cotton Candy Dream Ice Cream
Introduction
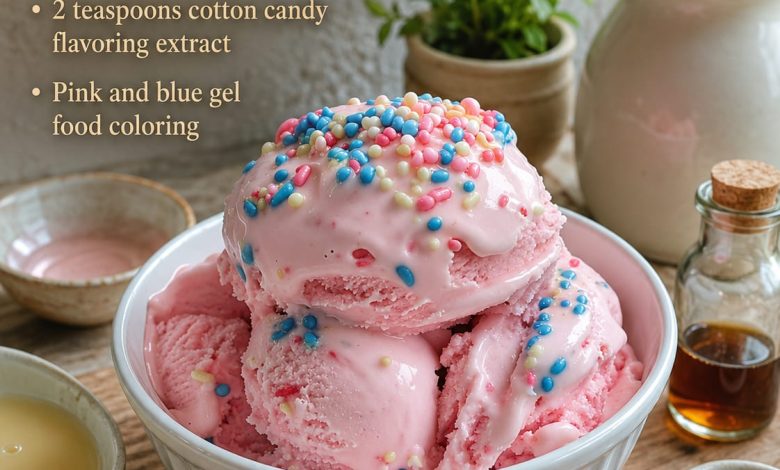
Cotton Candy Dream Ice Cream is a fun, colorful, and creamy homemade dessert inspired by the sweet taste of classic carnival cotton candy. With its soft pink and blue colors, smooth texture, and playful sprinkles, this ice cream is perfect for birthdays, summer parties, family gatherings, or any time you want a cheerful frozen treat.
This recipe is simple to prepare and does not require a complicated ice cream machine. The sweetened condensed milk gives the ice cream a rich and creamy base, while the cotton candy flavoring adds that nostalgic candy-shop taste. The pink and blue gel food coloring makes the dessert look magical and eye-catching, especially when served in scoops with colorful sprinkles on top.
Ingredients
For the Ice Cream Base
1 can, 14 ounces, sweetened condensed milk, cold
2 cups heavy whipping cream, very cold
2 teaspoons cotton candy flavoring extract
1 teaspoon vanilla extract
A pinch of salt
For the Color
Pink gel food coloring
Blue gel food coloring
For Topping
Colorful sprinkles
Mini candy pearls, optional
Cotton candy pieces, optional, added just before serving
ADVERTISEMENT
Instructions
1. Chill the Ingredients
Before starting, make sure the heavy whipping cream and sweetened condensed milk are very cold. Cold ingredients help the ice cream become lighter, smoother, and creamier.
Place your mixing bowl and beaters in the refrigerator for about 15 minutes if possible. This helps the cream whip better.
2. Prepare the Cream Base
Pour the cold heavy whipping cream into a large mixing bowl. Beat it using a hand mixer or stand mixer on medium-high speed until stiff peaks form. The cream should look thick, fluffy, and hold its shape.
Be careful not to overbeat, because the cream can turn grainy.
3. Add the Sweetened Condensed Milk
In a separate bowl, add the cold sweetened condensed milk. Stir in the cotton candy flavoring extract, vanilla extract, and a small pinch of salt.
ADVERTISEMENT
Mix until everything is smooth and well combined. The salt helps balance the sweetness and gives the ice cream a better flavor.
4. Combine the Mixtures
Gently fold the sweetened condensed milk mixture into the whipped cream. Use a spatula and fold slowly from the bottom to the top.
Do not stir too hard, because you want to keep the mixture light and airy. Continue folding until the ice cream base is smooth and creamy.
5. Divide and Color the Ice Cream
Divide the ice cream mixture into two bowls. Add a small amount of pink gel food coloring to one bowl and a small amount of blue gel food coloring to the other bowl.
Stir each bowl gently until the colors are soft and pretty. Add more food coloring only if you want a brighter color.
ADVERTISEMENT
6. Create the Cotton Candy Swirl
Spoon the pink and blue ice cream mixtures into a freezer-safe container, alternating the colors. Add a spoonful of pink, then a spoonful of blue, and continue layering until all the mixture is used.
Use a knife or skewer to gently swirl the colors together. Do not overmix, or the colors may blend too much.
7. Add Sprinkles
Sprinkle colorful sprinkles or candy pearls over the top of the ice cream. Press them lightly into the surface so they stay in place.
You can also add more sprinkles between the layers for extra color and texture.
8. Freeze the Ice Cream
Cover the container tightly with a lid or plastic wrap. Place it in the freezer for at least 6 hours, or overnight, until the ice cream is firm enough to scoop.
ADVERTISEMENT
For the best texture, let the ice cream freeze completely before serving.
9. Serve
Remove the ice cream from the freezer and let it sit at room temperature for 5 to 10 minutes before scooping. This makes it softer and easier to serve.
Scoop into bowls, cones, or dessert cups. Add extra sprinkles and a small piece of cotton candy on top just before serving.
Serving Suggestions
Cotton Candy Dream Ice Cream is perfect served in waffle cones, small dessert bowls, or party cups. It also looks beautiful as part of an ice cream bar with toppings like sprinkles, mini marshmallows, crushed cookies, and whipped cream.
For a fun party dessert, serve it with pink and blue decorations or add it between cookies to make cotton candy ice cream sandwiches.
Tips for Best Results
Use gel food coloring instead of liquid food coloring because gel gives stronger color without changing the texture of the ice cream.
Add cotton candy pieces only when serving. If mixed into the ice cream too early, they may melt and become sticky.
Do not overmix the pink and blue colors. Gentle swirling creates the prettiest cotton candy effect.
Use very cold cream for the best whipped texture.
ADVERTISEMENT
Storage
Store the ice cream in a tightly covered freezer-safe container. It will stay fresh for about 2 weeks.
To prevent ice crystals, press a piece of plastic wrap directly on the surface of the ice cream before closing the lid.
Conclusion
Cotton Candy Dream Ice Cream is a sweet, creamy, and colorful dessert that brings a playful carnival feeling into your kitchen. With its smooth texture, cotton candy flavor, and beautiful pink and blue swirls, it is a wonderful treat for both kids and adults.
This recipe is easy to make, fun to decorate, and perfect for special occasions or warm days when you want something bright, cheerful, and delicious.