ADVERTISEMENT
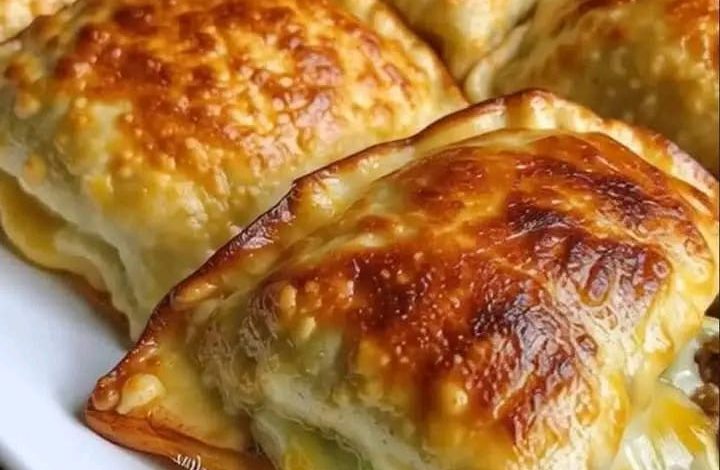
Cheesy Beef Puff Pastry Pockets
Introduction
These Cheesy Beef Puff Pastry Pockets are the perfect blend of golden, flaky pastry, savory seasoned beef, and gooey melted cheese. Each bite offers layers of crispiness on the outside and rich, delicious filling on the inside. They’re elegant enough for a dinner party, yet simple enough for a quick family meal.
Whether served as a snack, a main dish, or even a party appetizer, these puff pastry pockets always impress. They’re versatile, customizable, and guaranteed to disappear fast from the table. With their irresistible aroma, cheesy topping, and soft, buttery layers, this recipe is comfort food at its finest.
Ingredients
For the Beef Filling
-
500 g (1 lb) ground beef
-
1 small onion, finely chopped
-
2 cloves garlic, minced
-
1 tablespoon olive oil
-
1 small green pepper, diced
ADVERTISEMENT
-
1 tablespoon soy sauce (optional for flavor)
-
½ teaspoon paprika
-
½ teaspoon black pepper
-
½ teaspoon cumin
-
½ teaspoon salt (or to taste)
ADVERTISEMENT
-
1 tablespoon chopped parsley (optional)
For the Pastry
-
2 sheets puff pastry, thawed
-
1 egg (for egg wash)
-
1 tablespoon milk
For the Cheese Topping
-
1 cup shredded mozzarella
ADVERTISEMENT
-
½ cup cheddar cheese (optional)
-
2 tablespoons mayonnaise or cream (helps browning)
Directions
1. Prepare the Beef Filling
-
Heat olive oil in a pan over medium heat.
-
Add chopped onion and sauté until soft.
-
Add garlic and cook for 1 minute.
ADVERTISEMENT
-
Add the ground beef and cook until browned, breaking it apart.
-
Stir in bell pepper, soy sauce, paprika, cumin, pepper, and salt.
-
Cook for another 5–7 minutes until flavors blend.
-
Remove from heat, mix in parsley, and let cool slightly.
2. Prepare the Puff Pastry
-
Preheat your oven to 375°F (190°C).
-
Roll out the puff pastry sheets slightly and cut into equal rectangles or squares.
-
Place 1–2 tablespoons of beef mixture in the center of each piece.
-
Add a small amount of shredded mozzarella inside for extra creaminess (optional).
-
Fold the pastry over the filling to create a sealed pocket.
ADVERTISEMENT
-
Press edges with a fork or fold neatly for a clean finish.
-
Arrange the pockets on a baking sheet lined with parchment paper.
3. Add the Cheese Topping
-
Mix the shredded mozzarella, cheddar, and mayonnaise.
-
Brush the tops of the pastry pockets with egg wash (egg + milk).
-
Spoon a generous layer of the cheese mixture on top of each pocket.
-
Spread it evenly so the cheese melts beautifully.
4. Bake
-
Bake for 20–25 minutes or until the pastry is puffed, golden, and the cheese is bubbly and browned.
-
Remove from the oven and let cool for a few minutes before serving.
Serving Suggestions
-
Serve warm with ketchup, garlic sauce, or chili mayo.
-
Enjoy as a side with salad, fries, or roasted vegetables.
-
Make mini versions for party treats or appetizers.
Tips for Best Results
-
Make sure the filling is not too watery to avoid soggy pastry.
-
Thaw puff pastry fully before using for best puffing effect.
-
Add jalapeños or chili flakes for a spicy version.
-
For a richer flavor, add a spoon of cream cheese inside each pastry.
-
You can substitute beef with chicken, tuna, mushrooms, or vegetables.
Storage
-
Refrigerator: Store leftovers in a sealed container for up to 3 days.
-
Freezer: Freeze unbaked pockets for up to 1 month. Bake directly from frozen.
-
Reheat: Warm in the oven at 350°F (175°C) for 5–8 minutes.
Conclusion
These Cheesy Beef Puff Pastry Pockets are a golden, flaky, and flavor-packed delight that everyone will love. With their rich beef filling, creamy melted cheese, and beautifully browned tops, they make the perfect comfort snack or meal. Easy to prepare and impossible to resist, this recipe is sure to become a family favorite you’ll make again and again.