ADVERTISEMENT
Quick 20-Minute Homemade Bread
Introduction
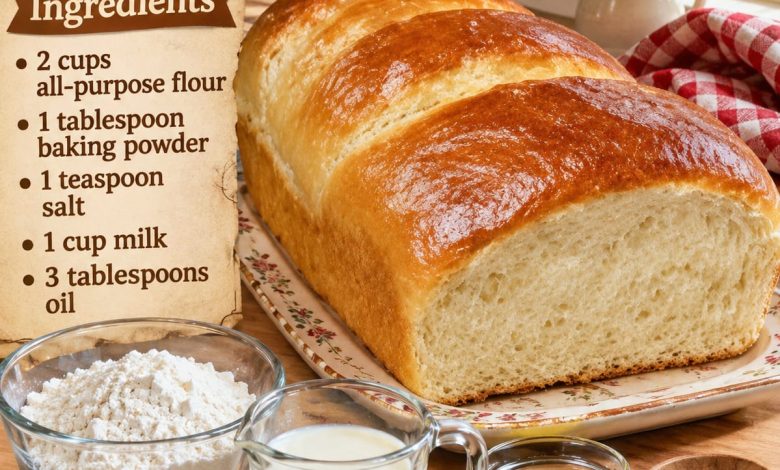
There’s nothing quite like the comforting aroma of freshly baked bread filling your kitchen. A warm, golden loaf with a tender center and a lightly crisp crust can turn even the simplest meal into something special. This Quick 20-Minute Homemade Bread is an easy, beginner-friendly recipe made with just five everyday ingredients.
Unlike traditional yeast bread, which requires kneading, rising, and several hours of preparation, this homemade quick bread uses baking powder to help the dough rise. That means there’s no yeast to activate, no lengthy proofing time, and no complicated baking techniques.
Made with all-purpose flour, baking powder, salt, milk, and oil, this simple recipe creates a soft, satisfying loaf that’s perfect for breakfast, lunch, or dinner. The milk adds moisture, while the oil helps keep the bread tender and delicious.
Although the preparation takes only a few minutes, the loaf needs additional time in the oven to bake completely. The result is a comforting homemade quick bread that’s easy enough for busy weekdays and delicious enough to share at family gatherings.
Whether you’re making sandwiches, serving warm bread with soup, or enjoying a slice with butter and jam, this recipe is a wonderful addition to your collection of homemade favorites.
ADVERTISEMENT
Recipe Information
Preparation Time: 10 minutes
Baking Time: 30–40 minutes
Total Time: Approximately 40–50 minutes
Servings: 8–10 slices
Cooking Method: Oven-baked
ADVERTISEMENT
Difficulty: Easy
Bread Type: No-yeast quick bread
Ingredients
2 cups (250 g) all-purpose flour
1 tablespoon (12 g) baking powder
1 teaspoon (6 g) salt
ADVERTISEMENT
1 cup (240 ml) milk
3 tablespoons (45 ml) vegetable oil
Optional Ingredients
1 tablespoon melted butter for brushing the crust
1 teaspoon sugar for a slightly sweeter flavor
½ teaspoon garlic powder for savory bread
ADVERTISEMENT
1 teaspoon dried herbs for additional flavor
Preparation Steps
Step 1: Preheat the Oven
Begin by preheating your oven to 375°F (190°C).
Allow the oven to reach the correct temperature before placing the bread inside.
Proper preheating is especially important for quick bread because baking powder begins reacting as soon as it comes into contact with the liquid ingredients.
A properly heated oven helps the bread rise evenly and develop a beautiful golden crust.
Position an oven rack in the center to encourage even baking.
Step 2: Prepare the Baking Pan
Lightly grease an 8 × 4-inch loaf pan with a small amount of oil or butter.
Alternatively, line the pan with parchment paper, leaving a little extra paper hanging over the sides.
This makes it easier to remove the finished bread without damaging its shape.
ADVERTISEMENT
Set the prepared pan aside while mixing the dough.
An 8 × 4-inch pan works well for creating a small, compact loaf with a soft interior.
Step 3: Measure the Dry Ingredients
In a large mixing bowl, add the all-purpose flour.
For the most accurate results, measure the flour using a kitchen scale.
If you’re measuring with cups, gently spoon the flour into the measuring cup and level the top with a straight edge.
Avoid packing the flour tightly, as too much flour can make the finished bread dense and dry.
Step 4: Add the Baking Powder and Salt
Add the baking powder and salt to the flour.
Using a whisk, mix the dry ingredients thoroughly for approximately 30 seconds.
This helps distribute the baking powder evenly throughout the flour.
Even distribution is important because baking powder provides the lift that gives this no-yeast bread its texture.
Make sure the baking powder is fresh and within its expiration date for the best results.
Step 5: Combine the Wet Ingredients
In a separate bowl or measuring jug, combine the milk and vegetable oil.
Whisk briefly until the ingredients are mixed.
The milk provides moisture and helps create a tender crumb, while the oil adds softness and prevents the bread from becoming overly dry.
Whole milk is recommended for a slightly richer flavor, but 2% milk also works well.
Step 6: Mix the Bread Dough
Pour the milk and oil mixture into the bowl containing the dry ingredients.
Using a wooden spoon or silicone spatula, gently stir until the flour is just incorporated.
The mixture will form a thick, sticky batter or very soft dough.
Avoid overmixing, as excessive stirring can develop too much gluten and produce a tough, dense loaf.
Stop mixing as soon as no large pockets of dry flour remain.
Unlike traditional yeast bread, this dough does not require kneading.
Step 7: Transfer the Dough to the Pan
Spoon the prepared dough into the greased loaf pan.
Use a spatula to spread it evenly and gently smooth the surface.
Because the dough is thicker than cake batter, you may need to press it lightly into the corners.
For a rustic appearance, leave a few gentle ridges on the surface.
If desired, brush the top lightly with a small amount of milk to encourage browning.
Step 8: Bake the Homemade Bread
Place the loaf pan on the center rack of the preheated oven.
Bake for approximately 30–40 minutes, or until the top is golden brown and the bread is cooked through.
The exact baking time will depend on your oven and the size of the pan.
Begin checking the bread after 30 minutes.
If the top begins browning too quickly, loosely cover it with aluminum foil during the remaining baking time.
Step 9: Check for Doneness
Insert a wooden toothpick or skewer into the center of the loaf.
If it comes out clean or with a few dry crumbs, the bread is likely ready.
For a more accurate check, use an instant-read thermometer. The center should reach approximately 200–205°F (93–96°C).
The loaf should feel firm on top and have a lightly golden exterior.
If the center is still wet or doughy, return the bread to the oven for another 5 minutes and check again.
Step 10: Cool the Bread
Once the bread is fully baked, remove the pan from the oven.
Allow the loaf to rest in the pan for approximately 10 minutes.
Carefully lift it out using the parchment paper or loosen the edges with a butter knife.
Transfer the bread to a wire cooling rack.
Allow it to cool for another 10–15 minutes before slicing.
This resting period helps the crumb set and makes the bread easier to cut.
Step 11: Brush with Butter
For an extra-soft and flavorful crust, brush the warm loaf with 1 tablespoon of melted butter.
The butter adds a beautiful shine and a delicious homemade flavor.
This step is optional but makes the bread especially inviting.
Step 12: Slice and Serve
Using a serrated bread knife, slice the loaf into even pieces.
Serve warm with butter, honey, jam, or your favorite spread.
The bread is also delicious alongside homemade soups, stews, salads, and comforting family dinners.
Because this is a baking-powder quick bread rather than yeast bread, expect a tender, slightly denser crumb instead of the stretchy, airy texture of traditional sandwich bread.
Helpful Tips for Perfect Homemade Bread
Use fresh baking powder. Baking powder is responsible for helping the bread rise, so make sure it is fresh and active.
Measure the flour correctly. Too much flour can make the loaf dry and heavy.
Do not overmix the dough. Stir only until the ingredients are combined to maintain a tender texture.
Use room-temperature milk. Milk that is not excessively cold helps the ingredients combine more easily.
Preheat the oven completely. A properly heated oven encourages an even rise and golden crust.
Choose the right loaf pan. An 8 × 4-inch pan creates a taller loaf, while a larger pan produces a flatter bread.
Avoid opening the oven too early. Frequent temperature changes can affect the bread’s rise.
Allow the loaf to cool slightly. Resting helps the bread hold its shape when sliced.
Delicious Recipe Variations
1. Garlic Herb Homemade Bread
Add ½ teaspoon garlic powder and 1 teaspoon dried Italian herbs to the flour mixture.
This variation is perfect for serving with pasta, soup, or roasted chicken.
2. Cheesy Quick Bread
Fold ¾ cup shredded cheddar cheese into the dough before transferring it to the loaf pan.
The cheese melts during baking, creating a savory bread with a deliciously rich flavor.
3. Honey Homemade Bread
Add 1 tablespoon honey to the milk and oil mixture.
This creates a slightly sweeter loaf that’s wonderful for breakfast.
4. Whole Wheat Quick Bread
Replace ½ cup of all-purpose flour with whole wheat flour.
The bread will have a slightly nuttier flavor and a heartier texture.
If the dough seems too dry, add 1–2 tablespoons of additional milk.
5. Cinnamon Sugar Bread
Add 2 tablespoons sugar and ½ teaspoon ground cinnamon to the dry ingredients.
This variation creates a lightly sweet breakfast bread that pairs beautifully with butter or jam.
6. Buttermilk Quick Bread
Replace the regular milk with 1 cup of buttermilk.
Buttermilk adds a subtle tangy flavor and helps create a tender crumb.
Serving Suggestions
Quick 20-Minute Homemade Bread is a versatile recipe that pairs beautifully with many dishes.
For Breakfast
Serve warm slices with softened butter, strawberry jam, honey, or peanut butter.
The simple flavor makes it an excellent choice for a comforting homemade breakfast.
With Soup
Enjoy a thick slice alongside tomato soup, chicken noodle soup, vegetable soup, or creamy potato soup.
The bread is perfect for dipping into warm broth.
With Dinner
Serve the bread alongside roasted chicken, beef stew, grilled vegetables, or homemade pasta.
Its tender texture and mild flavor complement many savory meals.
As Toast
Slice the cooled bread and toast it lightly until golden.
Top with butter, avocado, scrambled eggs, or your favorite breakfast spread.
For Snacks
Enjoy a slice with cheese, fresh fruit, or a warm cup of tea.
This simple homemade bread is satisfying without requiring elaborate toppings.
Storage Instructions
Allow the bread to cool completely before storing it.
Place it in an airtight container or wrap it tightly to prevent it from drying out.
Store at room temperature for up to 2 days in a cool, dry environment.
For longer storage, refrigerate the bread for approximately 4–5 days, although refrigeration may make it slightly firmer.
You can also freeze the bread for up to 2–3 months.
For convenient storage, slice the loaf before freezing and separate the slices with parchment paper.
When ready to enjoy, thaw at room temperature or warm individual slices in a toaster or oven.
Frequently Asked Questions
Can I Really Make This Bread in 20 Minutes?
The dough can be prepared in approximately 10 minutes, but a full loaf generally needs 30–40 minutes to bake.
The title refers to the recipe’s quick, easy preparation rather than a guaranteed 20-minute start-to-finish cooking time.
Do I Need Yeast for This Recipe?
No. This bread uses baking powder instead of yeast.
That means there’s no need to activate yeast, knead the dough, or wait for it to rise.
Can I Use Water Instead of Milk?
Yes, but the bread may be less rich and slightly less tender.
Milk provides additional flavor and helps create a softer crumb.
Why Is My Bread Dense?
Quick bread can become dense if the dough is overmixed, the baking powder is old, or too much flour is added.
Measure carefully and mix only until combined.
Can I Bake This Recipe as Rolls?
Yes. Divide the dough into small portions and place them in a greased muffin pan.
Bake at 375°F (190°C) for approximately 15–20 minutes, or until cooked through.
The exact time will depend on the size of the portions.
Can I Make This Bread Without an Electric Mixer?
Absolutely. This recipe requires only a mixing bowl, whisk, and spoon.
In fact, mixing by hand helps prevent overworking the dough.
Can I Add Seeds or Nuts?
Yes. You can fold in sunflower seeds, sesame seeds, chopped walnuts, or pumpkin seeds for additional flavor and texture.
Conclusion
Quick 20-Minute Homemade Bread is a simple and comforting recipe that proves you don’t need yeast or complicated techniques to enjoy freshly baked bread at home. With just five basic ingredients, this easy quick bread delivers a golden crust, tender interior, and delicious homemade flavor.
Perfect for busy mornings, family dinners, or an afternoon snack, this versatile loaf is a wonderful recipe to make whenever you’re craving warm, freshly baked bread.