ADVERTISEMENT
Caramelized Apple Upside-Down Cake
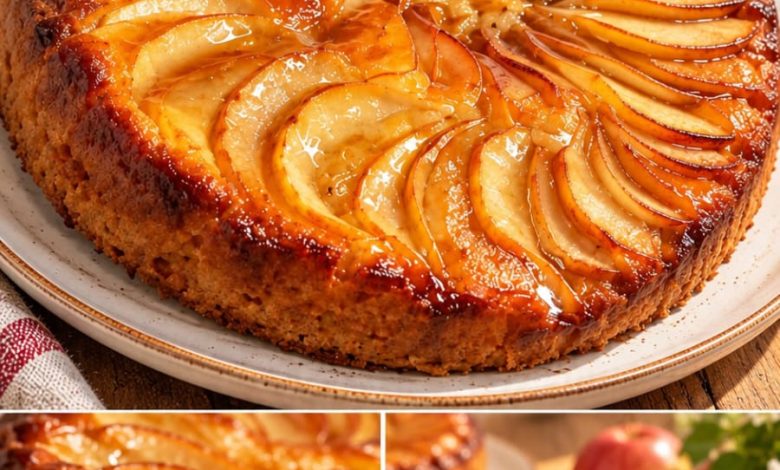
There is something irresistible about a homemade apple cake covered with glossy, caramelized fruit. This Caramelized Apple Upside-Down Cake combines thin slices of fresh apples arranged beautifully over a soft, buttery cake, all finished with a rich brown sugar caramel that melts into the fruit as it bakes. Once the cake is inverted, the apples become the star of the dessert, creating an impressive golden topping without the need for complicated frosting or decoration.
The cake itself is tender, moist, and delicately flavored with vanilla and warm cinnamon. As it bakes, the apple juices mingle with the butter and brown sugar, producing a naturally rich caramel sauce around the edges. It is a wonderful dessert for fall gatherings, Sunday dinners, holidays, or simply an afternoon at home with a warm cup of coffee.
Ingredients
For the Caramelized Apple Topping
3–4 medium apples
1/2 cup unsalted butter
3/4 cup packed light brown sugar
1 teaspoon ground cinnamon
1 tablespoon fresh lemon juice
1 teaspoon vanilla extract
Pinch of salt
For the Cake
2 cups all-purpose flour
2 teaspoons baking powder
1/2 teaspoon baking soda
1/2 teaspoon salt
1 teaspoon ground cinnamon
1/4 teaspoon ground nutmeg
3/4 cup unsalted butter, softened
1 cup granulated sugar
1/4 cup light brown sugar
3 large eggs, at room temperature
2 teaspoons vanilla extract
3/4 cup sour cream or plain Greek yogurt
1/2 cup whole milk
Optional for Serving
Warm caramel sauce
Vanilla ice cream
Whipped cream
Powdered sugar
Chopped toasted walnuts or pecans
ADVERTISEMENT
Preparation
1. Prepare the Baking Pan
Preheat the oven to 350°F (175°C).
Lightly grease the sides of a 9-inch round cake pan. For easier removal, you can place a circle of parchment paper on the bottom of the pan before adding the caramel mixture.
A pan with relatively high sides works best because the cake will rise while baking.
2. Prepare the Apples
Wash and dry the apples thoroughly. You can peel them if you prefer a softer topping, although leaving the peel on creates a beautiful rustic appearance and helps the slices maintain their shape.
Core the apples and cut them into thin, even slices.
ADVERTISEMENT
Place the slices in a bowl and gently toss them with the lemon juice. This helps prevent browning while you prepare the caramel.
3. Make the Brown Sugar Caramel
Melt the butter in a small saucepan over medium-low heat.
Add the brown sugar, cinnamon, vanilla, and a small pinch of salt. Stir gently until the sugar begins to dissolve and the mixture becomes smooth and glossy.
Allow the caramel to cook for approximately 1–2 minutes. It does not need to become extremely thick because it will continue cooking in the oven.
Pour the warm caramel mixture evenly into the bottom of the prepared cake pan.
ADVERTISEMENT
4. Arrange the Apple Slices
Starting around the outside edge of the pan, arrange the apple slices in overlapping circles.
Continue working toward the center, slightly overlapping each slice with the previous one. Take a little extra time with this step because the bottom of the pan will eventually become the beautiful top of your finished cake.
If you have additional apple slices, carefully tuck them into any open spaces.
The goal is to create a generous apple layer so that every slice of cake contains plenty of soft caramelized fruit.
5. Prepare the Dry Ingredients
In a medium mixing bowl, whisk together the flour, baking powder, baking soda, salt, cinnamon, and nutmeg.
ADVERTISEMENT
Set the mixture aside while you prepare the wet ingredients.
6. Cream the Butter and Sugars
Place the softened butter in a large mixing bowl.
Add the granulated sugar and brown sugar. Using an electric mixer, beat them together for approximately 3–4 minutes until the mixture becomes pale, creamy, and fluffy.
This step helps incorporate air into the batter, giving the finished cake a softer and lighter texture.
7. Add the Eggs and Vanilla
Add the eggs one at a time, mixing thoroughly after each addition.
Scrape down the sides and bottom of the bowl as necessary.
Add the vanilla extract and continue mixing briefly until everything is well combined.
8. Add the Sour Cream and Dry Ingredients
Add approximately one-third of the flour mixture to the butter mixture and mix on low speed.
Add half of the sour cream and half of the milk.
ADVERTISEMENT
Continue alternating between the dry ingredients and the remaining sour cream and milk until everything is incorporated.
Mix only until the batter is smooth. Avoid excessive mixing once the flour has been added, as this can make the cake dense.
The finished batter should be thick, creamy, and easy to spread.
9. Assemble the Cake
Carefully spoon the cake batter over the arranged apples.
Begin by placing small spoonfuls around the pan so you do not disturb the decorative apple pattern underneath.
Once most of the batter has been added, gently spread it into an even layer using a spatula.
Smooth the surface without pressing too firmly.
10. Bake Until Golden
Place the cake in the center of the preheated oven.
Bake for approximately 45–55 minutes, or until the cake becomes deeply golden and a toothpick inserted into the center comes out clean or with only a few moist crumbs.
Because the caramel around the edges can become very hot, place the cake pan on a baking sheet if you are concerned about possible bubbling.
11. Let the Cake Rest
Remove the cake from the oven and place it on a cooling rack.
Allow it to rest in the pan for approximately 10–15 minutes.
Do not allow it to cool completely in the pan. The caramel becomes thicker as it cools, which can make the cake more difficult to release.
12. Flip the Cake
Run a thin knife carefully around the outer edge of the cake.
Place a large serving plate upside down over the cake pan.
Using oven mitts, securely hold the plate and pan together and quickly turn them over.
Leave the pan in place for approximately 30 seconds, then gently lift it away.
The beautifully arranged apples should now be visible on top, coated with a shiny layer of golden caramel.
If a few apple slices remain attached to the pan, simply lift them carefully and return them to their original position on the cake.
Serving Suggestions
Allow the cake to cool slightly before cutting it into generous wedges.
It is particularly delicious when served slightly warm because the caramel remains soft and glossy while the cake underneath stays wonderfully tender.
For a classic presentation, serve each slice on its own with some of the caramel sauce spooned over the top.
For an indulgent dessert, add a scoop of vanilla ice cream. The cold, creamy ice cream melting against the warm caramelized apples creates a wonderful contrast.
A spoonful of lightly whipped cream also works beautifully, especially if you prefer something less sweet.
Tips for the Best Apple Upside-Down Cake
Use apples that remain relatively firm when baked. This helps the decorative slices maintain their shape rather than turning completely soft.
Slice the apples as evenly as possible so they cook at approximately the same rate.
Do not rush the arrangement of the apples. A neat overlapping pattern gives the finished cake its impressive appearance.
Avoid overbaking. The cake should be completely cooked in the center while remaining soft and moist.
Invert the cake while it is still warm. Waiting until the caramel is completely cold can make releasing it from the pan more difficult.
Storage
Store leftover cake covered at room temperature for up to 1 day.
For longer storage, place it in an airtight container and refrigerate for up to 4 days.
Individual slices can be gently reheated in the microwave for approximately 10–15 seconds before serving. This softens the cake and makes the caramel topping glossy again.
Conclusion
Caramelized Apple Upside-Down Cake is a beautiful home-style dessert that transforms simple apples into something truly special. The soft vanilla cake absorbs some of the buttery caramel as it bakes, while the thin apple slices become tender, glossy, and deeply flavorful.
Despite its impressive appearance, this cake does not require complicated decorating skills. The carefully arranged apples create their own natural decoration, and flipping the cake reveals a stunning golden topping every time.
Whether served warm with vanilla ice cream, enjoyed with afternoon coffee, or prepared as the centerpiece of a family dessert table, this caramelized apple cake delivers everything you want from classic home baking: tender cake, juicy fruit, warm spices, and plenty of rich caramel flavor in every slice.