ADVERTISEMENT
Peanut Butter Chocolate Bars
Introduction
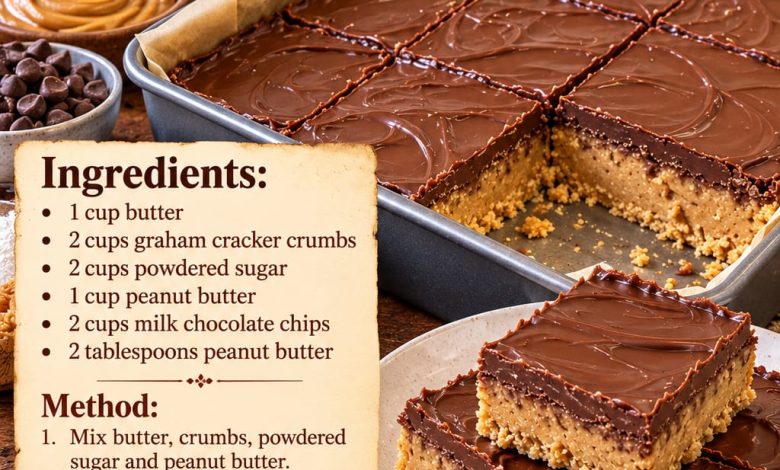
There’s something truly irresistible about the combination of creamy peanut butter and rich milk chocolate. These homemade Peanut Butter Chocolate Bars bring those two classic flavors together in a delicious no-bake dessert that’s easy to prepare and perfect for sharing with family and friends.
With a buttery graham cracker and peanut butter base topped with a smooth layer of melted chocolate, every bite delivers the perfect balance of sweetness, richness, and texture. The filling is soft and slightly crumbly, while the chocolate topping creates a beautiful finish that makes these bars look just as delicious as they taste.
One of the best things about this recipe is that it requires no oven, no complicated baking techniques, and only a handful of everyday ingredients. Simply mix the peanut butter filling, press it into a baking pan, spread melted chocolate over the top, and refrigerate until firm.
Whether you’re preparing a dessert for a holiday gathering, birthday party, family celebration, bake sale, or an afternoon treat, these Peanut Butter Chocolate Bars are guaranteed to satisfy your sweet tooth.
They’re also an excellent make-ahead dessert because they can be prepared in advance and stored in the refrigerator until you’re ready to serve.
ADVERTISEMENT
Recipe Information
Preparation Time: 15 minutes
Chilling Time: 1–2 hours
Total Time: Approximately 1 hour 30 minutes
Servings: 16–20 bars
Cooking Method: No-bake
ADVERTISEMENT
Difficulty: Easy
Ingredients
For the Peanut Butter Graham Cracker Layer
1 cup (226 g) unsalted butter, melted
2 cups (approximately 240 g) graham cracker crumbs
2 cups (240 g) powdered sugar
1 cup (approximately 260 g) creamy peanut butter
ADVERTISEMENT
For the Chocolate Topping
2 cups (approximately 340 g) milk chocolate chips
2 tablespoons (32 g) creamy peanut butter
Optional Garnishes
Chopped roasted peanuts
A light sprinkle of flaky sea salt
Extra melted chocolate for drizzling
ADVERTISEMENT
Crushed graham crackers
Preparation Steps
Step 1: Prepare the Baking Pan
Begin by preparing a 9 × 13-inch baking pan.
Line the bottom and sides with parchment paper, leaving a little extra paper hanging over the edges.
This will make it much easier to lift the finished bars out of the pan once they have chilled.
Lightly smooth the parchment paper against the bottom of the pan to prevent wrinkles.
Set the prepared pan aside while making the peanut butter mixture.
Step 2: Prepare the Graham Cracker Crumbs
If you’re using whole graham crackers, place them in a food processor and pulse until they become fine, even crumbs.
Alternatively, place the crackers in a resealable plastic bag and crush them using a rolling pin.
Measure 2 cups of crumbs and transfer them to a large mixing bowl.
ADVERTISEMENT
Fine graham cracker crumbs are important because they help create a smooth, compact base that holds together when sliced.
Avoid leaving too many large cracker pieces, as they can make the bars more difficult to cut neatly.
Step 3: Melt the Butter
Place 1 cup of unsalted butter in a microwave-safe bowl or small saucepan.
Melt gently until completely liquid.
If using the microwave, heat in short intervals and stir between each interval.
If using the stovetop, melt over low heat to prevent browning.
Allow the melted butter to cool slightly before combining it with the remaining ingredients.
The butter helps bind the graham cracker crumbs and creates the rich, tender texture of the peanut butter layer.
Step 4: Combine the Dry Ingredients
In a large mixing bowl, combine the graham cracker crumbs and powdered sugar.
Stir thoroughly until the ingredients are evenly distributed.
If the powdered sugar contains lumps, sift it before adding it to the bowl.
This helps create a smoother filling without pockets of dry sugar.
The powdered sugar provides sweetness, while the graham cracker crumbs give the bars structure and a subtle toasted flavor.
Step 5: Add the Peanut Butter
Add 1 cup of creamy peanut butter to the graham cracker and powdered sugar mixture.
Using a sturdy spoon or silicone spatula, begin mixing until the peanut butter is partially incorporated.
For the best texture, use a smooth, shelf-stable creamy peanut butter.
Natural peanut butter can also work, but it should be thoroughly stirred before measuring because separated oil may affect the consistency of the bars.
Step 6: Add the Melted Butter
Pour the slightly cooled melted butter into the mixing bowl.
Stir until all the ingredients are fully combined.
The mixture should become thick, soft, and slightly crumbly but should hold together when pressed between your fingers.
If necessary, use clean hands or a sturdy spatula to finish combining the ingredients.
Make sure no dry pockets of powdered sugar or graham cracker crumbs remain.
The finished mixture should have a rich peanut butter aroma and a uniform golden color.
Step 7: Press the Peanut Butter Mixture into the Pan
Transfer the prepared peanut butter mixture into the parchment-lined baking pan.
Spread it evenly across the bottom.
Using the back of a large spoon, an offset spatula, or the bottom of a measuring cup, press the mixture firmly into a smooth, even layer.
Pay special attention to the corners and edges to ensure the bars have a consistent thickness.
Pressing the mixture firmly is essential because it helps prevent the bars from crumbling when sliced.
Place the pan in the refrigerator for approximately 15–20 minutes while preparing the chocolate topping.
Step 8: Prepare the Chocolate Topping
Place the milk chocolate chips and 2 tablespoons of creamy peanut butter into a microwave-safe bowl.
Microwave in 20–30-second intervals, stirring thoroughly after each interval.
Continue until the chocolate is almost completely melted.
Remove the bowl from the microwave and stir until the remaining chocolate melts into a smooth, glossy mixture.
Be careful not to overheat the chocolate, as excessive heat can cause it to become thick, grainy, or scorched.
Alternatively, melt the chocolate and peanut butter together using a double boiler over gently simmering water.
The peanut butter helps create a softer chocolate topping that’s easier to slice after chilling.
Step 9: Spread the Chocolate Over the Base
Remove the chilled peanut butter base from the refrigerator.
Pour the melted chocolate mixture evenly over the surface.
Using an offset spatula or the back of a spoon, gently spread the chocolate into a smooth, even layer.
Work carefully to cover the entire peanut butter base, including the corners.
For a beautiful homemade appearance, use the tip of a spoon to create gentle swirls across the chocolate while it is still soft.
If desired, sprinkle chopped peanuts or a small pinch of flaky sea salt over the topping before it sets.
Step 10: Refrigerate Until Firm
Place the baking pan in the refrigerator.
Chill for at least 1 hour, or until the chocolate topping is firm and the peanut butter layer has set.
Depending on the temperature of your refrigerator, the bars may need up to 2 hours to become fully firm.
Avoid rushing this step because proper chilling makes the bars easier to slice and helps the layers hold together.
Step 11: Slice the Peanut Butter Chocolate Bars
Once the bars are firm, remove the pan from the refrigerator.
Lift the dessert out using the overhanging parchment paper and place it on a cutting board.
Allow it to sit at room temperature for approximately 5–10 minutes to slightly soften the chocolate topping.
Using a large, sharp knife, cut the dessert into evenly sized squares or rectangles.
For cleaner slices, warm the knife under hot water, dry it completely, and wipe the blade between cuts.
This helps prevent the chocolate topping from cracking and creates neat, professional-looking bars.
Step 12: Serve and Enjoy
Arrange the sliced Peanut Butter Chocolate Bars on a serving plate or dessert tray.
Serve slightly chilled or allow them to sit at room temperature for a few minutes for a softer texture.
Each bar should have a thick, creamy peanut butter graham cracker base topped with a smooth layer of rich milk chocolate.
Enjoy with a cold glass of milk, a warm cup of coffee, or your favorite afternoon beverage.
Helpful Tips for Perfect Peanut Butter Chocolate Bars
Use creamy peanut butter. Smooth peanut butter creates the best texture and helps the filling hold together.
Measure the graham cracker crumbs carefully. Too many crumbs can make the base dry and crumbly, while too few can make it overly soft.
Use powdered sugar instead of granulated sugar. Powdered sugar blends smoothly into the filling and prevents a gritty texture.
Press the base firmly. Compacting the peanut butter mixture helps the bars maintain their shape when sliced.
Melt the chocolate gently. Overheating chocolate can cause it to seize or become grainy.
Add peanut butter to the chocolate. This helps create a smoother topping that is less likely to crack when cut.
Chill completely before slicing. Proper chilling allows the layers to set and makes serving much easier.
Use a warm knife for clean cuts. A slightly warmed knife helps create neat squares without breaking the chocolate topping.
Delicious Recipe Variations
1. Dark Chocolate Peanut Butter Bars
Replace the milk chocolate chips with dark chocolate chips.
This variation creates a richer chocolate flavor and balances the sweetness of the peanut butter filling.
Dark chocolate is especially delicious for anyone who prefers desserts that are not overly sweet.
2. Crunchy Peanut Butter Chocolate Bars
Replace half of the creamy peanut butter with crunchy peanut butter.
The chopped peanut pieces add a satisfying crunch and extra nutty flavor.
3. Salted Peanut Butter Chocolate Bars
Sprinkle a small amount of flaky sea salt over the melted chocolate before chilling.
The salt enhances the sweetness and creates a delicious sweet-and-salty combination.
4. White Chocolate Peanut Butter Bars
Replace the milk chocolate chips with white chocolate chips.
This creates a sweeter, creamier topping that pairs beautifully with the peanut butter base.
5. Chocolate Swirl Peanut Butter Bars
After spreading the melted chocolate over the base, drizzle a small amount of warmed peanut butter across the surface.
Use a toothpick or knife to create decorative swirls.
This gives the bars a beautiful bakery-style appearance.
6. Peanut Butter Pretzel Bars
Replace ½ cup of the graham cracker crumbs with finely crushed pretzels.
The pretzels add a subtle salty flavor and extra texture that complements the sweet chocolate topping.
Serving Suggestions
Peanut Butter Chocolate Bars are perfect for a wide variety of occasions.
For family gatherings, arrange the bars on a large serving platter and garnish with a few chopped peanuts.
For holiday celebrations, cut them into smaller squares and place each piece in a decorative paper candy cup.
For birthday parties or potlucks, serve them alongside brownies, cookies, and other homemade desserts.
These bars are also a wonderful addition to dessert gift boxes because they hold their shape well when properly chilled.
For an extra indulgent treat, serve a bar with a scoop of vanilla ice cream and a drizzle of warm chocolate sauce.
Their rich peanut butter flavor also pairs beautifully with freshly brewed coffee or a cold glass of milk.
Storage Instructions
Store leftover Peanut Butter Chocolate Bars in an airtight container in the refrigerator.
Separate layers with parchment paper to prevent the bars from sticking together.
For the best flavor and texture, enjoy them within 5–7 days.
You can also freeze the bars for longer storage.
To freeze, arrange the sliced bars in a single layer on a baking sheet and freeze until firm.
Transfer them to a freezer-safe container, placing parchment paper between layers.
Freeze for up to 2–3 months for the best quality.
When ready to serve, thaw the bars in the refrigerator for several hours.
Avoid leaving them in a warm environment for extended periods because the chocolate topping can soften and the peanut butter base may become too delicate.
Frequently Asked Questions
Can I Make Peanut Butter Chocolate Bars Ahead of Time?
Yes. These bars are an excellent make-ahead dessert.
You can prepare them the day before serving and store them in the refrigerator until needed.
Do I Need to Bake These Bars?
No. This is a completely no-bake recipe.
The peanut butter base sets through chilling, while the melted chocolate topping becomes firm in the refrigerator.
Can I Use Natural Peanut Butter?
Yes, but the texture may vary.
Natural peanut butter often contains separated oils, so stir it thoroughly before measuring.
For the most consistent results, use a smooth, shelf-stable peanut butter.
Can I Substitute Graham Crackers?
Yes. Crushed digestive biscuits, vanilla wafers, or similar crisp cookies can be used instead.
Keep in mind that the flavor and texture may change slightly depending on the substitute.
Why Is My Peanut Butter Layer Crumbly?
A crumbly base may result from too many graham cracker crumbs, insufficient mixing, or not pressing the mixture firmly enough into the pan.
Make sure the ingredients are thoroughly combined and compact the base evenly.
Why Does My Chocolate Topping Crack When Sliced?
The chocolate may crack if it is too cold or if the topping is especially thick.
Allow the bars to rest at room temperature for a few minutes before slicing and use a warm, sharp knife.
Can I Use Semi-Sweet Chocolate Chips?
Absolutely. Semi-sweet chocolate chips are a great alternative to milk chocolate.
They create a slightly less sweet topping that balances the rich peanut butter filling beautifully.
Conclusion
Peanut Butter Chocolate Bars are a classic homemade dessert that combines rich chocolate, creamy peanut butter, and buttery graham cracker crumbs in every delicious bite. With their simple ingredients, easy no-bake preparation, and irresistible flavor, these bars are perfect for family gatherings, celebrations, or whenever you’re craving something sweet.
Whether you enjoy them straight from the refrigerator or slightly softened at room temperature, these homemade treats are sure to become a favorite.