ADVERTISEMENT
Mom’s Famous Cream Puffs
Introduction
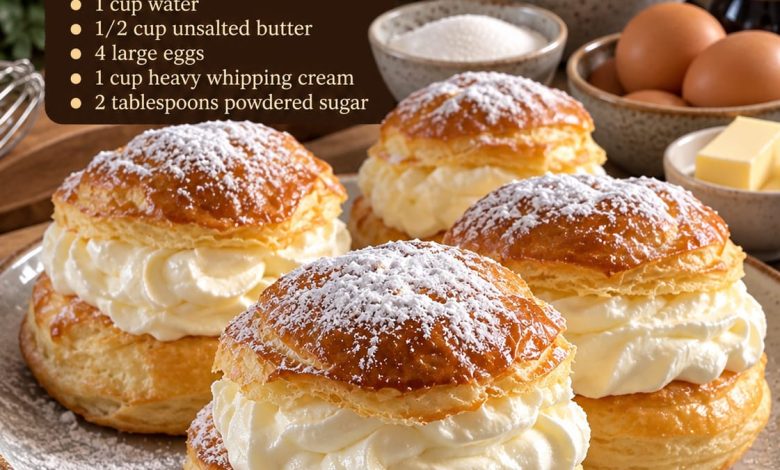
Mom’s Famous Cream Puffs are the kind of classic homemade dessert that never goes out of style. Light, golden pastry shells are baked until beautifully puffed and crisp, then filled generously with a smooth vanilla whipped cream filling. A delicate dusting of powdered sugar on top gives them the perfect finishing touch.
What makes homemade cream puffs so special is the contrast in textures. The pastry shell is light and slightly crisp on the outside with a hollow, airy center, while the filling is cool, creamy, and delicately sweet. Despite their elegant appearance, cream puffs are made from surprisingly simple pantry ingredients such as flour, butter, eggs, water, sugar, vanilla, and cream.
These beautiful pastries are perfect for holidays, birthdays, family celebrations, afternoon coffee, bridal showers, or whenever you want a homemade dessert that looks impressive on the serving table. Once you learn the basic technique for making the pastry, this recipe can easily become one of those treasured desserts you return to again and again.
Ingredients
For the Cream Puff Pastry
1 cup water
1/2 cup unsalted butter
ADVERTISEMENT
1 teaspoon granulated sugar
1 cup all-purpose flour
4 large eggs
1/4 teaspoon salt
For the Vanilla Cream Filling
1 cup cold heavy whipping cream
ADVERTISEMENT
2 tablespoons powdered sugar
1 teaspoon vanilla extract
For Finishing
Powdered sugar, for dusting
Preparation
Step 1: Preheat the Oven
Preheat your oven to 400°F (200°C).
Line a large baking sheet with parchment paper. This will help prevent the cream puffs from sticking and make cleanup much easier.
ADVERTISEMENT
Make sure the oven is completely preheated before the pastries go inside. The initial blast of heat is important because it creates steam inside the dough, which helps the cream puffs rise and develop their characteristic hollow centers.
Step 2: Prepare the Butter and Water Mixture
Place the water, unsalted butter, granulated sugar, and salt in a medium saucepan.
Set the saucepan over medium heat and stir occasionally until the butter has completely melted.
Bring the mixture to a gentle boil. As soon as it begins bubbling steadily, reduce the heat slightly and prepare to add the flour.
Step 3: Add the Flour
Add all of the flour to the saucepan at once.
ADVERTISEMENT
Using a sturdy wooden spoon or silicone spatula, stir vigorously until the flour absorbs the liquid and forms a smooth ball of dough.
Continue cooking and stirring the dough for approximately 1–2 minutes. You may notice a thin film beginning to form on the bottom of the saucepan. This is normal and indicates that some of the excess moisture has cooked away.
Remove the saucepan from the heat.
Step 4: Cool the Dough Slightly
Transfer the warm dough to a large mixing bowl and allow it to cool for approximately 5–7 minutes.
The dough should remain warm, but it should not be extremely hot when you begin adding the eggs. If it is too hot, the eggs may start cooking instead of blending smoothly into the pastry dough.
Step 5: Add the Eggs
Add the eggs one at a time.
Beat thoroughly after each egg until it has been completely incorporated before adding the next one. At first, the dough may look separated or slippery, but continue mixing and it will gradually become smooth again.
After the final egg is incorporated, the dough should be thick, glossy, and smooth. When lifted with a spoon or spatula, it should fall slowly rather than pour like a liquid batter.
Step 6: Shape the Cream Puffs
Using two spoons, a cookie scoop, or a piping bag fitted with a large round tip, portion the dough onto the prepared baking sheet.
ADVERTISEMENT
Leave approximately 2 inches of space between each mound because the pastries will expand significantly as they bake.
For a neat appearance, gently smooth any pointed tops with a fingertip lightly moistened with water.
Try to keep the portions similar in size so that all of the cream puffs bake evenly.
Step 7: Bake Until Golden
Place the baking sheet in the preheated oven and bake for approximately 20–25 minutes, or until the cream puffs are well risen and deeply golden.
Avoid opening the oven door during the first part of baking. Opening it too early can release the steam and heat needed to keep the pastries properly puffed.
Once they are golden and firm, reduce the oven temperature to 350°F (175°C) and continue baking for approximately 5–10 additional minutes to help dry the centers.
Step 8: Cool the Pastry Shells
Remove the cream puffs from the oven.
Carefully make a small opening in the side of each puff with the tip of a sharp knife. This allows trapped steam to escape and helps prevent the shells from becoming soggy as they cool.
Transfer them to a wire rack and allow them to cool completely.
Do not add the cream filling while the shells are warm, as the heat can cause the whipped cream to soften or melt.
Preparing the Vanilla Cream Filling
Pour the cold heavy whipping cream into a chilled mixing bowl.
Add the powdered sugar and vanilla extract.
Using an electric mixer, begin beating on low speed and gradually increase to medium-high.
Continue whipping until the cream forms firm peaks and holds its shape. Be careful not to overbeat it, as heavy cream can eventually turn grainy and begin separating.
Keep the whipped cream refrigerated until you are ready to assemble the pastries.
Filling the Cream Puffs
Once the pastry shells are completely cool, use a sharp serrated knife to carefully slice each cream puff horizontally through the center.
You can cut the tops completely off or leave a small section attached like a hinge.
Transfer the vanilla whipped cream into a piping bag fitted with a large star tip. Pipe a generous swirl of cream into the bottom half of each pastry.
If you do not have a piping bag, simply spoon the whipped cream into each shell.
Place the pastry tops gently over the filling.
Finishing Touch
Arrange the filled cream puffs on a serving platter.
Using a small sieve, generously dust powdered sugar over the tops. The powdered sugar adds just enough additional sweetness while giving the pastries their beautiful bakery-style appearance.
For the prettiest presentation, add the powdered sugar shortly before serving.
Tips for Perfect Cream Puffs
One of the most important parts of making successful cream puffs is properly cooking the flour mixture before adding the eggs. Cooking it briefly helps remove excess moisture and prepares the dough to absorb the eggs.
Add the eggs individually rather than all at once. This makes it much easier to control the consistency of the pastry dough.
Do not open the oven during the early stages of baking. The steam trapped inside each pastry is responsible for creating the dramatic rise and hollow center.
Bake the shells until they are truly golden rather than pale. Underbaked cream puffs contain too much moisture and are more likely to collapse after being removed from the oven.
Always cool the pastry shells completely before filling them.
For the whipped cream, cold ingredients work best. Chilling the mixing bowl and beaters beforehand can make whipping the cream quicker and easier.
Delicious Filling Variations
Although classic vanilla whipped cream is wonderfully simple, these cream puffs can be customized in many different ways.
For a richer dessert, fill them with vanilla pastry cream or homemade custard.
Chocolate lovers can add cocoa powder to the whipped cream or drizzle melted chocolate over the finished pastries.
Fresh strawberries or raspberries can be tucked inside with the cream for a fruity variation.
You can also add a little lemon zest to the filling for a bright citrus flavor or replace some of the vanilla with almond extract for a different aroma.
Storage
Unfilled cream puff shells can be stored in an airtight container at room temperature for about one day. If they lose some of their crispness, place them in a 300°F (150°C) oven for several minutes and allow them to cool again before filling.
Once filled with whipped cream, the cream puffs should be stored covered in the refrigerator.
For the best texture, enjoy filled cream puffs the same day they are assembled. Over time, moisture from the cream will naturally soften the pastry shells.
Conclusion
Mom’s Famous Cream Puffs are a beautiful example of how a few basic ingredients can become an elegant homemade dessert. The golden pastry shells are airy and delicate, while the generous vanilla cream filling makes every bite wonderfully smooth and satisfying.
Finished with a snowy dusting of powdered sugar, these classic pastries look impressive enough for a special celebration while still carrying the comforting charm of something made in a family kitchen.
Serve them freshly filled when the pastry still has a delicate crispness and the vanilla cream is cool and fluffy. Whether they are prepared for a holiday table, family gathering, or simply as a weekend baking project, these homemade cream puffs are the kind of dessert everyone will reach for.
Would you enjoy Mom’s Famous Cream Puffs with classic vanilla cream, rich chocolate filling, or fresh strawberries?