ADVERTISEMENT
Baked Apple Fritters
Introduction
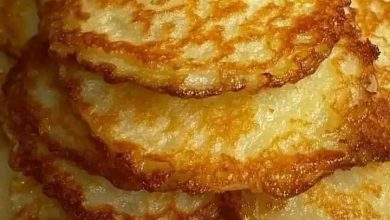
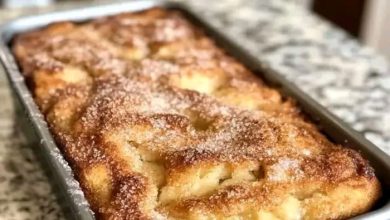
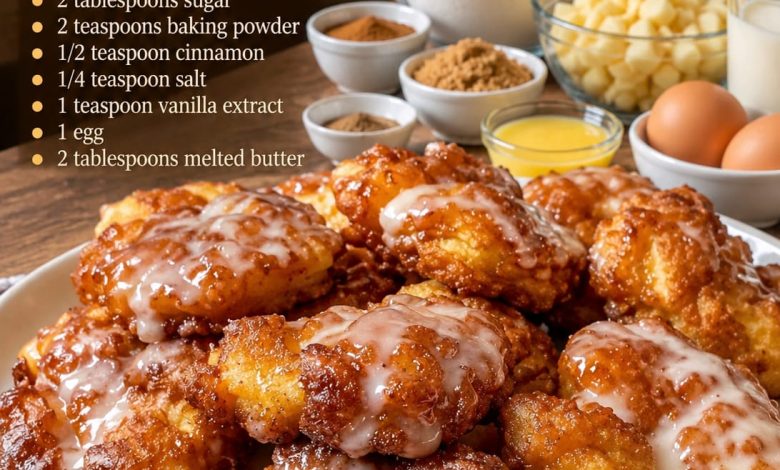
There is something especially comforting about the combination of warm apples, cinnamon, nutmeg, vanilla, and a sweet glaze. Baked Apple Fritters bring all of those classic flavors together in a soft, tender treat that can be enjoyed without the traditional deep-frying method. Each fritter is filled with juicy pieces of fresh apple and warm spices, then baked until beautifully golden and finished with a simple vanilla glaze.
These homemade apple fritters are perfect for a cozy fall morning, weekend breakfast, family brunch, afternoon coffee break, or simple homemade dessert. Baking makes preparation easier and less messy while still producing fritters with lightly crisp edges and a moist, apple-packed center.
The secret is using plenty of fresh diced apples and avoiding overmixing the batter. As the fritters bake, the apples soften and release their natural sweetness into the surrounding dough. Once they’re topped with a thin vanilla glaze, every bite has a wonderful balance of buttery pastry, tender fruit, cinnamon spice, and sweetness.
Ingredients
For the Apple Fritters
- 2 cups (250 g) all-purpose flour
- 2 teaspoons baking powder
- 2 tablespoons granulated sugar
- 1/2 teaspoon ground cinnamon
- 1/4 teaspoon ground nutmeg
- 1/4 teaspoon salt
- 1 large egg
- 2/3 cup (160 ml) milk
- 1 teaspoon vanilla extract
- 2 tablespoons unsalted butter, melted
- 2 large apples, peeled, cored, and diced into small pieces
For the Cinnamon Sugar Topping
- 2 tablespoons brown sugar
- 1/2 teaspoon ground cinnamon
- 1 tablespoon melted butter
For the Vanilla Glaze
- 1 cup (120 g) powdered sugar
- 2–3 tablespoons milk
- 1/2 teaspoon vanilla extract
- Pinch of salt
Preparation
1. Preheat the Oven
Preheat your oven to 400°F (200°C).
Line a large baking sheet with parchment paper or a silicone baking mat. Lightly grease the surface if necessary to prevent the fritters from sticking.
ADVERTISEMENT
The oven should be fully heated before the fritters go in. A properly preheated oven helps the outside begin setting quickly while keeping the center soft and tender.
2. Prepare the Apples
Peel and core the apples, then cut them into small cubes.
Try to keep the pieces relatively uniform so they soften evenly during baking. Pieces around 1/4 to 1/2 inch work particularly well.
For these fritters, firm apples with a balance of sweetness and acidity are ideal. Granny Smith, Honeycrisp, Pink Lady, or Gala apples can all work well.
Place the diced apples in a bowl and set them aside.
ADVERTISEMENT
3. Combine the Dry Ingredients
In a large mixing bowl, add the flour, baking powder, granulated sugar, cinnamon, nutmeg, and salt.
Whisk the ingredients thoroughly until the spices and baking powder are evenly distributed throughout the flour.
Cinnamon provides that familiar warm apple-dessert flavor, while the small amount of nutmeg adds extra depth without overpowering the fruit.
4. Combine the Wet Ingredients
In a separate medium bowl, crack in the egg and whisk lightly.
Add the milk, vanilla extract, and melted butter.
ADVERTISEMENT
Whisk until everything is smooth and completely combined.
Make sure the melted butter has cooled slightly before adding it to the egg mixture so the heat doesn’t begin cooking the egg.
5. Make the Fritter Batter
Pour the wet ingredients into the bowl containing the dry ingredients.
Use a spatula or wooden spoon to gently fold everything together until just combined.
Do not overmix the batter. A few small streaks of flour are fine at this stage because you’ll continue folding when the apples are added.
ADVERTISEMENT
Overmixing develops the gluten in the flour and can make the finished fritters tougher rather than tender.
6. Fold in the Apples
Add the diced apples to the batter.
Gently fold until the pieces are distributed throughout.
The batter should be thick and chunky rather than thin like pancake batter. This thickness allows the fritters to hold their shape on the baking sheet.
Make sure each portion contains plenty of apple pieces so every fritter has fresh apple in every bite.
7. Shape the Fritters
Using a large spoon or cookie scoop, drop generous portions of batter onto the prepared baking sheet.
Leave approximately 2 inches between each fritter.
Gently flatten the tops with the back of your spoon. Don’t make them completely flat—an irregular, rustic shape gives apple fritters their traditional appearance and creates delicious browned edges.
Depending on their size, this recipe should produce approximately 8–10 fritters.
ADVERTISEMENT
8. Add the Cinnamon Sugar Topping
In a small bowl, combine the brown sugar and cinnamon.
Lightly brush the tops of the fritters with melted butter, then sprinkle the cinnamon-brown sugar mixture over them.
During baking, the butter and brown sugar will create a lightly caramelized surface and deepen the warm cinnamon flavor.
9. Bake Until Golden
Place the baking sheet in the preheated oven.
Bake the fritters for approximately 15–18 minutes, or until they are puffed, golden around the edges, and fully cooked in the center.
Larger fritters may require another 2–3 minutes.
You can check one by inserting a toothpick into a section of dough rather than directly into an apple piece. It should come out clean or with only a few moist crumbs attached.
10. Create a More Caramelized Finish
For an even deeper golden exterior, switch the oven to broil for approximately 1–2 minutes after the fritters have finished baking.
Watch them constantly during this step. Brown sugar can caramelize very quickly under the broiler.
Once the tops are golden and lightly crisp, remove the baking sheet from the oven.
11. Prepare the Vanilla Glaze
While the fritters cool slightly, prepare the glaze.
Add the powdered sugar to a medium bowl. Pour in 2 tablespoons of milk, vanilla extract, and a tiny pinch of salt.
Whisk until smooth.
If the glaze is too thick, add additional milk about 1 teaspoon at a time. If it becomes too thin, add a little more powdered sugar.
The ideal consistency should be thick enough to cling to the fritters while still being easy to drizzle.
12. Glaze the Fritters
Allow the baked fritters to cool for approximately 5–10 minutes.
For a thin glaze that partially melts into the fritters, drizzle it over them while they’re still warm.
For a thicker, more visible white glaze, allow the fritters to cool almost completely before glazing.
Use a spoon to generously drizzle the vanilla glaze across each fritter.
Allow them to sit for several minutes so the glaze can begin setting.
Serving Suggestions
Baked Apple Fritters are especially delicious when served slightly warm. The centers remain tender, the apples are soft and juicy, and the vanilla glaze provides just enough sweetness.
For breakfast or brunch, serve them alongside freshly brewed coffee, hot tea, or a cold glass of milk.
For dessert, try serving a warm fritter with a scoop of vanilla ice cream. The ice cream slowly melting over the cinnamon-spiced apples creates a wonderful contrast of temperatures and textures.
You can also finish the fritters with a light dusting of powdered sugar in addition to the glaze for a bakery-inspired presentation.
Tips for Perfect Baked Apple Fritters
Choose firm apples that hold their shape when baked. Apples that are extremely soft can release too much moisture and disappear into the batter.
Dice the apples relatively small. Large chunks can prevent the fritters from holding together properly, while very tiny pieces won’t provide the same satisfying apple texture.
Don’t overmix the batter. Stir only until everything is combined.
Keep the fritters similar in size so they finish baking at approximately the same time.
And don’t skip the brief cooling period before glazing. A little cooling prevents all of the glaze from immediately running off the fritters.
Flavor Variations
For an even stronger fall flavor, replace the cinnamon and nutmeg with about 1 teaspoon of apple pie spice.
A handful of chopped pecans or walnuts can also be folded into the batter for additional crunch.
If you enjoy caramel apples, drizzle a small amount of caramel sauce over the finished fritters shortly before serving.
You can also add a little maple syrup to the vanilla glaze for a warm maple-apple variation.
Storage and Reheating
Baked apple fritters are at their best on the day they’re prepared, especially while they’re still slightly warm.
If you have leftovers, allow them to cool completely and store them in an airtight container in the refrigerator for up to 3 days.
Reheat individual fritters briefly in the microwave, or place them in a 325°F (165°C) oven for several minutes until warm.
If you know you’ll be reheating the fritters later, consider storing them without glaze and adding fresh glaze after reheating.
Make-Ahead Option
You can prepare the dry ingredients ahead of time and keep them covered at room temperature.
The apples can also be peeled and diced shortly before baking. If preparing them a little earlier, toss them with a small amount of lemon juice to help prevent browning.
For the best texture, however, combine the wet and dry ingredients only when you’re ready to bake. Once the baking powder becomes wet, it begins activating, so the batter shouldn’t sit for an extended period.
Conclusion
Baked Apple Fritters deliver everything that’s wonderful about a classic apple treat: tender pieces of fruit, fragrant cinnamon and nutmeg, buttery dough, caramelized edges, and a sweet vanilla glaze. Baking them instead of deep-frying makes the preparation simpler while still creating a deliciously comforting homemade dessert.
They’re easy enough for an everyday treat but special enough for a holiday breakfast or weekend brunch. Serve them warm with coffee in the morning, enjoy one as an afternoon snack, or turn them into dessert with vanilla ice cream and caramel sauce.
With their golden exterior, soft apple-filled center, warm spices, and glossy vanilla glaze, these homemade Baked Apple Fritters are the kind of simple comfort food you’ll want to make whenever fresh apples and cozy flavors are calling.