ADVERTISEMENT
Cherry Pie Bars
Introduction
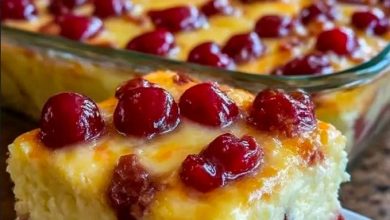
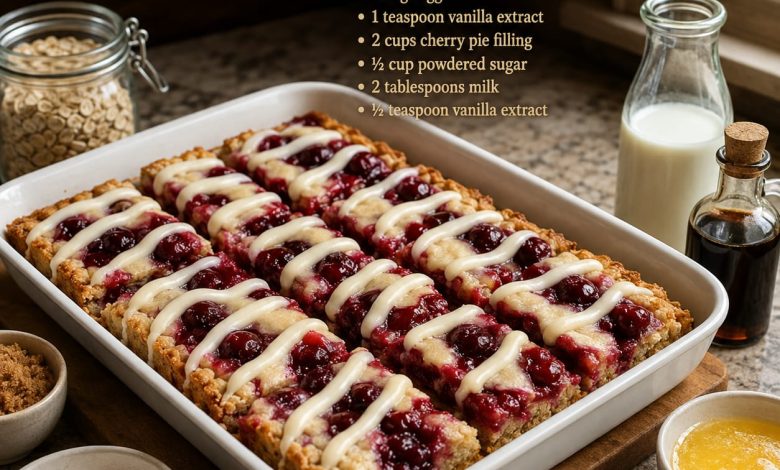
Cherry Pie Bars are a beautiful homemade dessert that combines the comforting flavors of classic cherry pie with the convenience of easy-to-serve dessert bars. They feature a tender, buttery oat base, a generous layer of sweet and slightly tart cherry pie filling, and a smooth vanilla glaze drizzled over the top.
These bars are perfect when you want the flavor of homemade pie without having to prepare, roll, and shape a traditional pie crust. The oatmeal adds a pleasantly rustic texture, while the juicy cherries keep every bite moist and flavorful. Once finished with the creamy vanilla glaze, these bars look impressive enough for a holiday dessert table while remaining simple enough for everyday home baking.
Serve them for family gatherings, potlucks, holidays, afternoon coffee, or whenever you’re craving a comforting fruit-filled dessert.
Ingredients
For the Cherry Pie Bars
1 cup old-fashioned rolled oats
1 cup all-purpose flour
ADVERTISEMENT
½ cup packed light or dark brown sugar
1 teaspoon baking powder
¼ teaspoon salt
½ cup (1 stick / 113 g) unsalted butter, melted
1 large egg, room temperature
ADVERTISEMENT
1 teaspoon vanilla extract
2 cups cherry pie filling
For the Vanilla Glaze
½ cup powdered sugar
2 tablespoons milk
½ teaspoon vanilla extract
ADVERTISEMENT
Preparation
1. Prepare the Baking Pan
Preheat the oven to 350°F (175°C).
Lightly grease an 8×8-inch or 9×9-inch baking pan, then line it with parchment paper, leaving a little parchment hanging over the sides. This will make it much easier to lift the finished bars from the pan.
Set the prepared pan aside while you make the oat mixture.
2. Combine the Dry Ingredients
In a large mixing bowl, add the old-fashioned rolled oats, all-purpose flour, brown sugar, baking powder, and salt.
Stir everything together until the ingredients are evenly combined and there are no large lumps of brown sugar remaining.
ADVERTISEMENT
The oats give these bars their rustic texture and help create a slightly chewy, buttery base that pairs beautifully with the soft cherry filling.
3. Add the Wet Ingredients
Pour the melted butter into the dry mixture.
Add the egg and vanilla extract.
Stir until everything is thoroughly combined. The mixture should look moist and crumbly rather than like a traditional cake batter.
If necessary, use your hands or the back of a spoon to make sure all the dry ingredients are incorporated.
4. Create the Bottom Layer
Reserve approximately 1 cup of the oat mixture for the topping.
Transfer the remaining mixture to the prepared baking pan.
Using your fingers, the back of a spoon, or the bottom of a measuring cup, press the mixture firmly and evenly across the bottom of the pan.
Make sure the base reaches all four corners and is relatively even in thickness.
ADVERTISEMENT
5. Add the Cherry Filling
Spoon the cherry pie filling over the oat base.
Carefully spread it into an even layer, making sure there are cherries throughout the entire pan.
Avoid pressing too firmly because you want the cherry layer to remain distinct from the crust underneath.
For an especially fruity dessert, you can add a few additional cherries on top.
6. Add the Crumb Topping
Take the reserved oat mixture and crumble it evenly over the cherry filling.
You don’t need to completely cover the cherries. Leaving small areas of bright red filling visible creates an attractive rustic appearance and allows some of the cherry juices to caramelize slightly during baking.
Gently press a few larger pieces of the topping into place without flattening everything.
7. Bake the Cherry Pie Bars
Place the pan in the center of the preheated oven.
Bake for approximately 30–35 minutes, or until the edges are golden brown and the cherry filling is bubbling gently.
The top should have a beautiful golden color, while the center should feel set.
If the top begins browning too quickly, loosely cover the pan with aluminum foil for the final few minutes.
8. Cool Completely
Remove the pan from the oven and place it on a wire cooling rack.
Allow the bars to cool completely before adding the glaze.
This step is important because cutting them while they’re still hot can cause the cherry filling to spread and the bars to fall apart.
For especially neat slices, refrigerate the cooled bars for about 30 minutes before cutting.
Prepare the Vanilla Glaze
While the bars are cooling, prepare the simple vanilla glaze.
Add the powdered sugar to a small bowl.
Pour in the milk and vanilla extract, then whisk until completely smooth.
The glaze should be thick enough to create visible ribbons when drizzled but still thin enough to flow easily from a spoon.
If it’s too thick, add milk about ½ teaspoon at a time. If it becomes too thin, simply mix in a little more powdered sugar.
Glaze and Slice
Once the Cherry Pie Bars have completely cooled, drizzle the vanilla glaze generously over the top.
Allow the glaze to set for approximately 10–15 minutes.
Using the parchment paper as handles, carefully lift the entire dessert from the baking pan and place it on a cutting board.
Use a sharp knife to cut it into squares or rectangular bars. Wipe the knife between cuts if you want especially clean edges.
Serving Suggestions
Cherry Pie Bars are wonderful served at room temperature, but they can also be enjoyed slightly warm.
For an extra-special dessert, serve a warm bar with a scoop of vanilla ice cream. The cold, creamy ice cream melting over the warm cherries creates a delicious contrast.
They also pair beautifully with freshly whipped cream, hot coffee, tea, or a cold glass of milk.
Helpful Tips
Use old-fashioned rolled oats rather than instant oats for the best texture. Rolled oats provide more structure and a satisfying homemade bite.
Allow the bars to cool completely before slicing. The cherry filling thickens as it cools, making the finished bars much easier to handle.
Don’t completely cover the cherry layer with the crumb topping. Allowing some cherries to remain visible makes the finished dessert more colorful and attractive.
For additional flavor, you can add ½ teaspoon almond extract to the cherry filling. Almond and cherry flavors complement each other especially well.
For a slightly crunchier topping, sprinkle a small handful of sliced almonds over the bars before baking.
Storage
Store leftover Cherry Pie Bars in an airtight container in the refrigerator for up to 4–5 days.
You can enjoy them chilled or allow them to return to room temperature before serving.
If you’d like them warm, heat an individual bar briefly before serving. If you’ve already added the glaze, use gentle heat so it doesn’t completely melt.
Conclusion
Cherry Pie Bars are the perfect combination of an old-fashioned fruit dessert and an easy homemade treat. The buttery oat crust provides a deliciously tender and slightly chewy foundation, while the rich cherry filling brings plenty of juicy fruit flavor. A simple vanilla glaze ties everything together with just the right amount of sweetness.
They’re easier to prepare and serve than traditional cherry pie, making them an excellent choice for family dinners, holidays, bake sales, potlucks, or weekend baking. With their beautiful layers of golden oat crumble, vibrant cherries, and creamy vanilla drizzle, these Cherry Pie Bars are just as inviting to look at as they are delicious to eat.